Showing posts with label Top Note Die. Show all posts

Monday, May 7, 2012

Masculine Monday 7/5/12 - Make a Wish

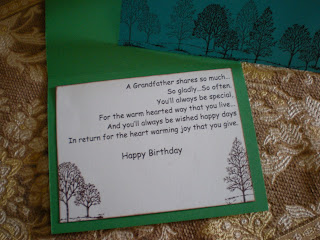
Didn't have much time over the past few days for a new card on Masculine Monday so I went through my library and found this one that I had made for my Dad's Birthday.

When I made this one I made a series of three in total all using Lovely as a Tree.  Each card used a different stamp from that set.

The envelop was made to accompany the card using the MS Scoreboard.


Hope you enjoy.

Nancy

I like to know what you think, so please leave me a comment.

Tuesday, February 14, 2012

TST # 53 A Masculine Card


Today being Valentines Day You would think that I would use it as my inspiration for the Try Stampin on Tuesday Sketch Challenge.  However masculine cards are sometimes difficult to achieve so I decided to take the sketch challenge and make it into a masculine card. 

Turning the sketch and making it a landscape card I used Sense of Time which is now a discontinued stamp set from Stampin Up, but it was one of my first sets and I really like using it for masculine cards.

Hope you enjoy!

Nancy

Sunday, February 5, 2012

SFF Remake Wine and Chocolate


I hope that you have taken the time to visit us over at Stampin Fun and Friends.  Here is another of our projects done my way.

This is a remake of one done by Tanya Bell.  Her's included a little different kind of sweet, but we enjoy chocolate with our wine so I incorporated that into my project.

This would make a great hostess gift at your next get together.

Cheers!

Nancy

Tuesday, January 24, 2012

TST #50

Today's sketch over at Try Stampin on Tuesday was similar to my black and white Birthday card for a fellow co-worker which was posted the beginning of the month, but I had to change it up. I took a piece of beige CS cut 1/8" smaller than the 4 1/4"x5 1/2" card front and ran it through the Cuttlebug using the Top Note Die. This allowed me to give just a hint of a border on the outside, but it also gave me a "Top Note" to use elsewhere.  This is a great way to stretch your cardstock as you don't see what is hiding behind the card front anyway. Then I layered the Chocolate Chip CS on top of that again. Taking a small strip of beige CS again I made a ribbon and ran it through the Cuttlebug with an embossing folder.  The decorative element in Old Olive was from a Cuttlebug die called Floral Borders.  The medalion on the front of the card is made using a Cricut and then the butterflies are from the Beautiful Wings embosslit. 
 
Remember the Top Note that you cut from the front of the card.  Here it is on the inside of the card and again embellished with the remainder of the die fragments from the front of the card.

Hope you enjoy!

Nancy

Tuesday, January 10, 2012

TST #48 & Makeover Monday Challenge #9

This weeks challenge over at Try Stampin on Tuesday was an instant choice.  What I mean by that is I am trying to use up scraps that I have already available and only cutting the base of the card (part of my New Years Resolution).  So once I went through my scrap box I came up with this card.  I also came across another challenge over at Paper Crafters Library that I thought this same card fit into.

I already had a top note cut out in Old Olive then I had to choose a card base and second accent colour.  I had ribbon that I found at the Dollar Store that matched the Old Olive and it had flowers on it that looked a lot like those from Fabulous Florets.  From there my accent colours had to be Old Olive and Chocolate Chip.

To put this card together start my spritzing the background of the card base then adhering just over 1/2 of the Top Note.  I stamped the leaves from the Fabulous Florets and then stamped them off two more times for a faded effect. Cut a piece of Chocolate Chip CS 1" wide. With the Old Olive punch using the Scalloped Edge Punch. One side was not enough so I punched the adjacent side as well and then adhered the ribbon down the centre.  Stamp twice on a scrap piece of Whisper White CS and using the largest flower from Fabulous Florets cut them out.  Shap them with a pencil and adhered them together.  Punching a hole in the centre of the flower I took a strip of Chocolate Chip and made a fringe for the stamens of the flower and put it through the hole in the flower to secure it. Glue Dots were used to adhere the flowers to the card front.  Added my brads to the top and DONE!

So proud that I once again used up scraps.

Hope you enjoy!

Nancy