Monday, December 30, 2013

A Snowman for my "New Little Man"

We are very proud to announce that our Son and DIL have blessed us with another Grandchild.  Wyatt Peter (after his Grandpa) joined his Big Brother Edwin on December 11th.  Yes folks he is a numerical baby born on 11/12/13.  He is the spitting image of his Big Brother and his Dad when he was a baby, so we definitely know he is one of ours!  Everyone is doing just fine and settling into a new routine.

For Christmas I decided to make him a Snowman Diaper Cake.  I had made Edwin a motorcycle when he was born.
Even though this is just  straight forward rounds of diapers it was much more challenging than making the motorcycle.  The scarf is a receiving blanket and the hat is just that.

For those of you who may not have see the motorcycle diaper cake I have attached it as well.

Thanks for stopping by.

Nancy

Your comments mean a lot to me, so please remember to leave one.

Tuesday, December 24, 2013

TST #148 Woodgrain Accent

Well only one more sleep before good old Saint Nick comes visiting.  Don't know about your household, but with work and all of the other obligations things have been very hectic around my house.  So hectic in fact that I almost forgot to post my card for this weeks challenge at Try Stampin on Tuesday.

This week our sketch challenge adds the extra element of wood accent or woodgrain to the card.
I decided not to incorporate the three little extra embellishments in the top and bottom corners.
I started with a piece of DSP that I had on hand that was full of woodgrain.  Then by accident I picked up a dabber that had red not chocolate chip on it so that is why the sponging appears to have a reddish hue to it.
Next I chose the Lovely as a Tree set which was my very first SU set purchased.  I haven't used it in a while and again with the woodgrain theme I thought it only fitting.  Butchers twine was wrapped around the middle and then the star accents were added.  

This will make a great masculine birthday card, which I know I will need in the near future.  

I hope you like what I have come up with.  Now it's your turn.  Hop on over to the TST site and see what the other great Designers have in store for you.

Lastly this will probably be my last post for this year and because of that I would like to personally thank everyone that has taken the time to leave me a comment on my blog.  I wish you all and your families a Very Merry Christmas or whatever you may celebrate at this time of year, along with a very Safe and Happy New Year!  See you in 2014!!

Nancy

Monday, December 16, 2013

HOC C&S Happy Holidays Blog Hop

Welcome to the House of Cards Term One Blog Hop!  If you've come here from Mia's blog, then you are in the right place!  If you have just stumbled here and would like to participate, please hop over to the House of Cards challenge blog to get started! We've got some fabulous sponsors that are providing prizes, so make sure to leave comments at each stop for a chance to win!

http://i42.photobucket.com/albums/e325/pballrsgirl/white%20christmas/bhg7.jpg
This challenge is a photo inspiration challenge and is open from December 1-15.  It is an Anything Goes so you can make a card, decoration or anything else that you might think of that is inspired by this photo.

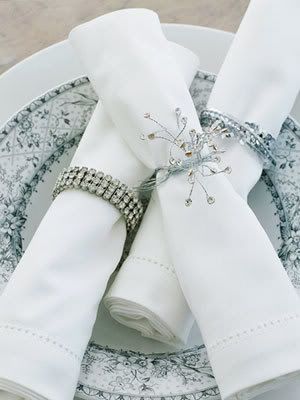
I can just imagine the great dinner that will be part of this elaborate diner plate.  The Holiday Season is a special time of year for everyone.  No matter what your celebration is, it is  time to reflect back on the past year and its challenges and achievements and to look ahead at what the following year may bring.  It is also time to spend with those that you love and cherish and remember those no longer with us, that make this Holiday and special one.

I love the colours of this photo, but trying to guess just which colours I should use became a bit of an adventure.  There were several attempts at getting just the right colours to accent the photo  but I finally came up with Night of Navy and black with a touch of bling!  I also kept within my House of Cards theme of Clean and Simple.

To start I cut out a mask from a Post-it and used that to create the shadowed area.  Then with the Night of Navy I inked up the snowflake stamp and then with the Black I lightly "bammed" it.  This allowed some of the areas to appear even darker with just a hint of black.
 
Once the outside was complete I stamped on the inside just in one corner to finish off the card.
 A touch of bling was added to the centre of three snowflakes and then it was mounted onto accent DSP and then the card base.  
Once I had the colours the rest came together rather quickly which was good because I needed to make 50 of these cards for friends and family!


House of Cards Design Team
One last note.  I would like to personally wish each and every one of you a Safe and Happy Holiday and only good things for the coming year!

Nancy

Thanks for stopping by!  Please join in the fun of our hop and make your way over to Daen'Ys blog.

Pet Lovers "Paw"fect Card

Ok sorry for the pun but I just had to.

A couple of weeks ago for the House of Cards final challenge I make a card with the Snowflakes stamp that I had and I thought what a great idea for my groomers card.  I cut out a template for a paw print and then sponged the openings of the template.  Then using the snowflakes stamp I stamped over the template so that the snowflakes would only show on the paw print.


Of course this card will accompany the usual treat of "Bark", fitting once again for the girls there as they all have a sweet tooth.

Enjoy Ladies!!

Thanks for stopping by.

Nancy

Your comments mean a lot to me to please remember to leave one.

Tuesday, December 10, 2013

TST # 146

Time is marching by so fast these days and don't you know it, it is time for another Try Stampin on Tuesday card.  This week the challenge is to use a little gold in your project or card.  Since I have been making most of my cards this year in blue, as you can see, I had a hard time coming up with something that had the gold in it so I decided to change it up a little and add yellow.

Here is our sketch for this weeks challenge.
Nice and simple and easy to put together.
I used the little snowflakes that were punched out from the border punch to accent the image in the centre.
As I was cutting out the DSP that I used my blade kept getting stuck (time for a new blade) and messing up the edges of the DSP so I decided to use my distressing tool and distress all the edges of the card.

I know I kind of bent the rules a little but I do have yellow (a shade of gold) on the card so I hope that will be accepted by all.

Now it's your turn.  See what you can come up with and don't forget to post your card on the TSOT site so we can all admire it.

Thanks for stopping by.

Nancy

Your comments mean a lot to me so please remember to leave one.


Tuesday, November 26, 2013

TST Something Different & the start of a "Blue Christmas"

Yes todays challenge at Try Stampin on Tuesday is a little different.  We have no sketch or colour challenge for you to follow.  We all are doing our own thing, BUT we are all making tags with instructions on how we achieved them.  I hope that you will find my tag cheerful and give one a try on your own.
Supplies Needed:
tag (or cut one to your own size and shape)
stamp set
embossing powder, heat gun
inks
SU Decorative Strip Northern Frost
SU Decorative Strip Join in the Cheer
SU Snow Flurry Bigz
glue and dimensionals
bling

Start by stamping your tag using Versamark and then heat emboss it using clear or 
coloured embossing powder. 
Sponge your tag using the accenting colours of your card stock (CS).
Next cut out all of your snowflakes.  I used two shade of blue and then vanilla CS for my flakes.
After cutting out the vanilla flakes I stamped them using the darkest ink and then sponged them.
With the largest flake adhere it to your tag and then with the second largest flake adhere it to the side.  
These will become your anchors for the remaining flakes.
Start assembling your flakes using alternate colours, ie., dark blue, vanilla, light blue (any variation of these colours)
Don't be afraid to shape your flakes to give them even more dimension.
Once you have them all put together start placing them onto the tag.
Add a little bling in the centre of each flake as well.

The last thing you will do will be adhere the sentiment.  
 First thought was going for a dark blue, but it didn't show up as well so plan B 
add the Peace and Joy in the lighter blue.
The edges of the Peace and Joy were sponged with the darker blue.

I wanted lots of layers for this tag and I think I have achieved this. 

Each year I decorate my tree in a different colour.  My daughter calls my tree the "Martha Stewart" tree.  Over the years we made ornaments for the kids with the kids and now they have all of their own ornaments and I can have the designer tree that I want.

Over the next few weeks the majority of my Christmas creations will be in the blue colours so I guess that means I will be having a blue tree as well.  Guess you will have to wait and see what my, as Elvis would say, "Blue Christmas" will look like.  

So now "TAG" your it. Let's see what kind of tags you come up with and don't forget to post them on our site to show everyone your great talent!

Thanks for stopping by.  

Nancy

Your comments mean a lot to me so please remember to leave one.


Tuesday, November 12, 2013

TSOT #144 Fine Feather Marker

Welcome back.  Try Stampin on Tuesday has a challenge for you today that makes you think. For this card you must incorporate a removable tag.

I have a card for you that will incorporate a bookmark instead of a tag, which will go perfect for a gift of a book for any reader.  Using the feather as a bookmark it will add an additional gift to the book that you may give or even a gift card to a favourite book store.
I started by creating my card base and stamped it with three of the feathers.  I started with the largest feather and then created a mask and stamped the additional feathers on top, but actually they appear as if they are underneath the largest feather.  Then with French Script I masked all three feathers and stamped the base.  I distressed the edges to give the effect of a well read book.
Using the Spellbinders Labels 13 I cut out the next layer.  The longest feather from the set was used to create a buckle or belt for the bookmark to be attached to.  Then folding a piece of lavender CS the final feather was stamped out and then fussy cut.  A magnet was placed at the tip of the feather on both sides and then this was put through the long feather and held in place.  
Now all we need is a great book to go with this card.  What do you think you could come up with. Stop by Try Stampin on Tuesday and see what the other great Designers have for you.  

Thanks for stopping by.

Nancy

Your comments mean a lot to me so please remember to leave one.


Monday, November 11, 2013

HOC C&S Lest We Forget...

I thought I would combine the photo challenge from House of Cards today with a very special celebration...Remembrance Day!
color nature
How fitting is it that the photo offers such perfect Poppies for a date that has so much significance.  My father is a WWII Naval Vet and I could not be more proud of him and all of the other men and women past and present serving our country.


The poppy was printed onto CS and then painted with markers.  Then I fussy cut it out and adhered it with a dimensional.  For the card base I spritzed on Old Olive and then using the splatters from French Foliage I added in a few of those.  Finally I use the swirls from Everything Eleanor and the sentiment from Warmest Wishes to complete this Clean and Simple card. 
This card is for you Dad.  Thank you so much for contributing to our countries freedom!  

Need more inspiration?  Hop on over to the House of Card site to see what the other great Designers have in store for you for Clean and Simple cards.

Thanks for stopping by and Thanks to all of our Service Men and Women serving this Great Land of ours.

Nancy

Your comments mean a lot to me so please remember to leave one.


Tuesday, October 29, 2013

TST #142 All the Leaves are Gone!

Yes Autumn has just about finished its grand colour display and the majority of the leaves are down and raked up.  However this week I decided to give autumn just one more chance to show it's colours.  I have chosen a muted colour scheme for my card instead of the vibrant autumn colours.

Here is the great sketch that we have to work with this week at Try Stampin on Tuesday.

Use the colour ORANGE on your card!

I think that there are so many possibilities for this sketch and I know that I will keep it in my book of sketches for future use.
The leaves were copied onto double sided DSP that I had on hand using a photo copier.  The DSP that I chose had a combination of pale orange and the green. I wanted the clean lines of the maple leaf so I sketched out the leaves and simply copied them. Once they were copied out I fussy cut them and then edged the sides with a marker to make the sides bolder.
I was very pleased with the results and hope that you are as well.  Now it's your turn.  Give this great sketch a try and don't forget to post your accomplishments on our site!

Thanks for stopping by.

Nancy

Your comments mean a lot to me so please remember to leave one. 

Tuesday, October 15, 2013

TST #140

About a month ago CherylAnn, our leader over at Try Stampin on Tuesday, came up with a plan to have the Designers split into two teams.  Instead of us posting on a weekly basis she decided to go with  every other week.  Even with this new plan I am really having a hard time getting my act together to get my post done on time.  That four letter "WORK" keeps getting in the way, along with having to put more and more time into looking after my Dad.  I hope that this will change but I can't see the light at the end of the tunnel right now.

This week the sketch was nice and simple.
But even with it being simple I managed to screw it up.  I put my whole card together and then realized that I had placed the items on upside down.  Good thing it was the type of card that could work the other way.
You can see here were I goofed and put the accents on the wrong way.  
 
Now it's time for you to show us your stuff.  Hop on over to Try Stampin on Tuesday and see what the other Great Designers have in store for you.  Don't be afraid to show us your mistakes either!  We can't be perfect all the time.....just most of the time! Don't we wish!

Thanks for stopping by.

Nancy

Your comments mean a lot to me so please remember to leave one.  

Monday, October 14, 2013

Sunflower Anniversary

First I would like to wish all my Canadian Friends a Happy Thanksgiving and my American Friends a Happy Columbus Day!  The weather up here above the 49th has been a mix this weekend.  Saturday was spectacular and great for being outside, Sunday wet and great to snuggle up with a book inside and so far today it looks promising!

Today I would like to show you an Anniversary card I put together for my Son and Daughter-in-Law.  Each year I try and make a card that follows along with the theme that they had for there wedding, that being Sunflowers.
I started by using a piece of white CS and running it through my Cuttlebug using the Ray-o-sunshine embossing folder.  Then with my ink I sponged the raised portions of the embossed areas.
Then stamping the Sunflower onto the CS I sponged it with two different shades of yellow and a little orange to give it a little more depth.  Once I had it all shaded I cut down between the different petals and then cut the flower in half.  I used the smaller half under the upper half to give the flower more depth again.  Then I shaded the area behind the flower with my Chocolate Chip to make it stand out even more.  The last thing I did was add "Seed" beads (very fitting since the last name is Seed) as the centre accent of the flower.

I'm sure that they are going to love it and it will be added to there Sunflower card collection.

Now for a somewhat funny thing.  We cooked a ham for Thanksgiving and had some last night for dinner.  My husband had the great idea to make scalloped potatoes along with the ham.  We usually make our scalloped potatoes from scratch because I prefer to make home made rather than box made.  However we were rushed for time so he purchased a box of scalloped potatoes. I told him to make sure that he got milk as well....but he forgot.  So what to do when you don't have milk on hand...use coffee creamer milk.  Not just any coffee creamer milk, but ID French Vanilla coffee creamer milk.  I know it sounds gross, but he mixed it half and half with water and OMG the scallops were to die for.  They almost tasted like ice cream.  So our new philosophy is use what you have on hand!

Hope you like my sunflower and try your scallops with something other than milk.  You may just like them.

Thanks for stopping by.

Nancy

Your comments mean a lot to me so please remember to leave one.
HOC C&S Sketch #2

The definition of Clean and Simple is as follows from our definitions at House of Cards:

Clean & Simple:  These cards use minimal or NO embellishment.  There should be lots of "white space" present on your card--open space with no stamping or anything else.  One layer cards are usually considered CAS as long as they are not covered in stamping.

However, this week we had a very busy sketch which I thought did not quite go with a Clean and Simple look.  
There was a lot of thought put into this card even though it doesn't look like it because it didn't quite turn out the way I would have wanted it to.  
I created a mask for the centre point and traced it.  Then with the negative portion of the mask I stamped the wording from French Foliage.  along with the leaves and the stamp mark.  Then using the reverse of the negative I placed it over the centre point and stamped the outer water marks.
 
The leaf was stamped out and sponge coloured, crinkled it up and using twine I created a barbed wire effect with to finish off the card.  

I know that it is kind of pushing the envelop for a Clean and Simple card, but it still does work.  

How would you see this sketch in a Clean and Simple form?  Show us your work and don't forget to post it to our site this week.  The other Great Designers have other options for you to get even more inspired.

Thanks for dropping by.

Nancy

Your comments mean a lot to me so please remember to leave one.


Thursday, October 3, 2013

HOC Photo Inspiration Shabby & Vintage with Birthday Wishes on the Side

Today is my daughter Ashley's 27th birthday.  She is far from a Girlie-girl, but I thought that I would make her a vintage style card for her birthday.    The inspiration for the card came from the House of Cards, photo inspiration challenge that I used on Monday's post.  My style for HOC is Clean and Simple, but I thought that I would take it up a notch for this card and be a little more fussy.
http://blogs.mydevstaging.com/blogs/centsational-style/files/2012/09/autumn-branch-centerpiece-bhg.jpg


Happy Birthday Ashley...
Love Mom and Dad

Tuesday, October 1, 2013

TST #138 A Hint of Lime

It is certainly a birthday month for me.  I have been making birthday cards it seems every week for a co-worker.  This week over at Try Stampin on Tuesday we have not only a sketch, but a colour combination challenge for you to try.
Use Black and White and any other colour

I decided to kick it up a notch and go with lime green.
I started with my green base and added the black.  Cutting a second piece of the lime green I stamped it up using the words from French Foliage.  Then onto a piece of white CS I stamped the remaining leaves and accent stamps.  Using a Postage Stamp Punch I punched out the images.  I chose to go square instead of round like the sketch.
I added a sloppy string bow and stamped the sentiment just below the string onto the black to bring more attention down.

Hope you like what I have come up with.  Need more inspiration then see what the other great designers have in store for you over at Try Stampin.

Thanks for stopping by.

Nancy

Your comments mean a lot to me so please remember to leave one.