Showing posts with label 3D. Show all posts

Tuesday, August 20, 2013

TST # 132 Sense of Time...

I must confess before I even start my blog for today.  The card you are about to see is one I made a couple of years back.  Fitting that my title and the card would be made with the SU set "Sense of Time" because these days I just feel like I have no time or I am running out of time.

I missed last week because I have been with my Dad looking after him.  He had a few dizzy spells and was very unstable on his feet so the Retirement Complex that he is in sent him to the emergency for investigation.  Good ending to this story.  After I have tried for several years to convince his old family doctor and specialist that he is on toooooo many medications the specialist at the hospital remarked that it was no wonder he was having dizzy spells because he was on too much medication.  Finally!!!!!  Long story short Dad's medications have been reduced to almost half of what he was on and even a couple of the ones that he remains on have been reduced.  The improvement in Dad has been 180 degrees.  He is more alert and has no problems walking even without using a cane or walker which he had to do before.  We have been fortunate enough to win the lottery with this specialist because he is also a geriatric physician and totally understands what is going on with Dad.

I am hoping that things will start to settle down over the next couple of weeks.  Unfortunately because my brother lives in Florida, I am the only sibling around to help out with Dad.  If it were not for my Dear Hubby I would be totally insane by now.

Now onto today's card.  I modified the Try Stampin on Tuesday sketch just a tad but the inside of the card makes up for the front.

I used my Cricut for a lot of the cut outs on this card, along with my circle cutter.  The outside is fairly simple but once you open it it comes to life.....
 
The inside of the card resembles more of the sketch than the outside and that was why I chose to use it for this sketch.

I don't have the SU pop up cake die but I managed to create a makeshift version so that I could put together this card.  Rather than stacking the die cut pieces one on top of each other I spread them out.


This card took a while to make as I remember it, but it was well worth it once it was finished.  Needless to say because it took so long to make I cherish it and it is in my office showcase.

Now it's your turn.  You don't have to be as elaborate as this card but if you need more inspiration hop on over to the Try Stampin site and see what the other Great Designers have in store for you.

Thanks for stopping by.

Nancy

Your comments mean a lot to me so please remember to leave one.


Thursday, February 14, 2013

Happy Valentine's Day

Happy Valentine's Day everyone.  I hope that each and everyone of you have someone special to celebrate this special day with.

For me, I have to say that just about every day is Valentine's Day for me because I am married to my best friend.  He makes every day special.

Today I have two cards for you.  The first is a simple card that I made for Stampin Fun and Friends.  This is a spiral pop-up card.  For most pop-up cards the spiral portion is made with a circle cut round and round.  To go along with the Valentine's theme I decided to take a heart and make it into a spiral giving the spiral a little more character.

The second of my Valentine's cards for Stampin Fun and Friends is again a spiral card but with even more depth and character.  This one has a double spiral that becomes a 3D heart when the card opens.
So no mater who you are with today I wish you a very Happy Valentine's Day and may your Heart be Content.

Thanks for dropping by.

Nancy

Your comments mean a lot to me, so please remember to leave one.

Monday, December 24, 2012

Thank You, Thank You

This past year my Brother and I became Power of Attorney over my Father, which let me tell you is a very big undertaking.  If it was just my Father that we was dealing with it might not be so bad but we are dealing with his new wife and her family as well.

We have had to also take Dad's car away on him and this has therefore put us in the driver's seat so to speak to get him around.  There have been several people that have helped us out over the past few months out of the goodness of their hearts and have asked for nothing in return.  As a simple token of our appreciation I have made these Thank You cards for them.

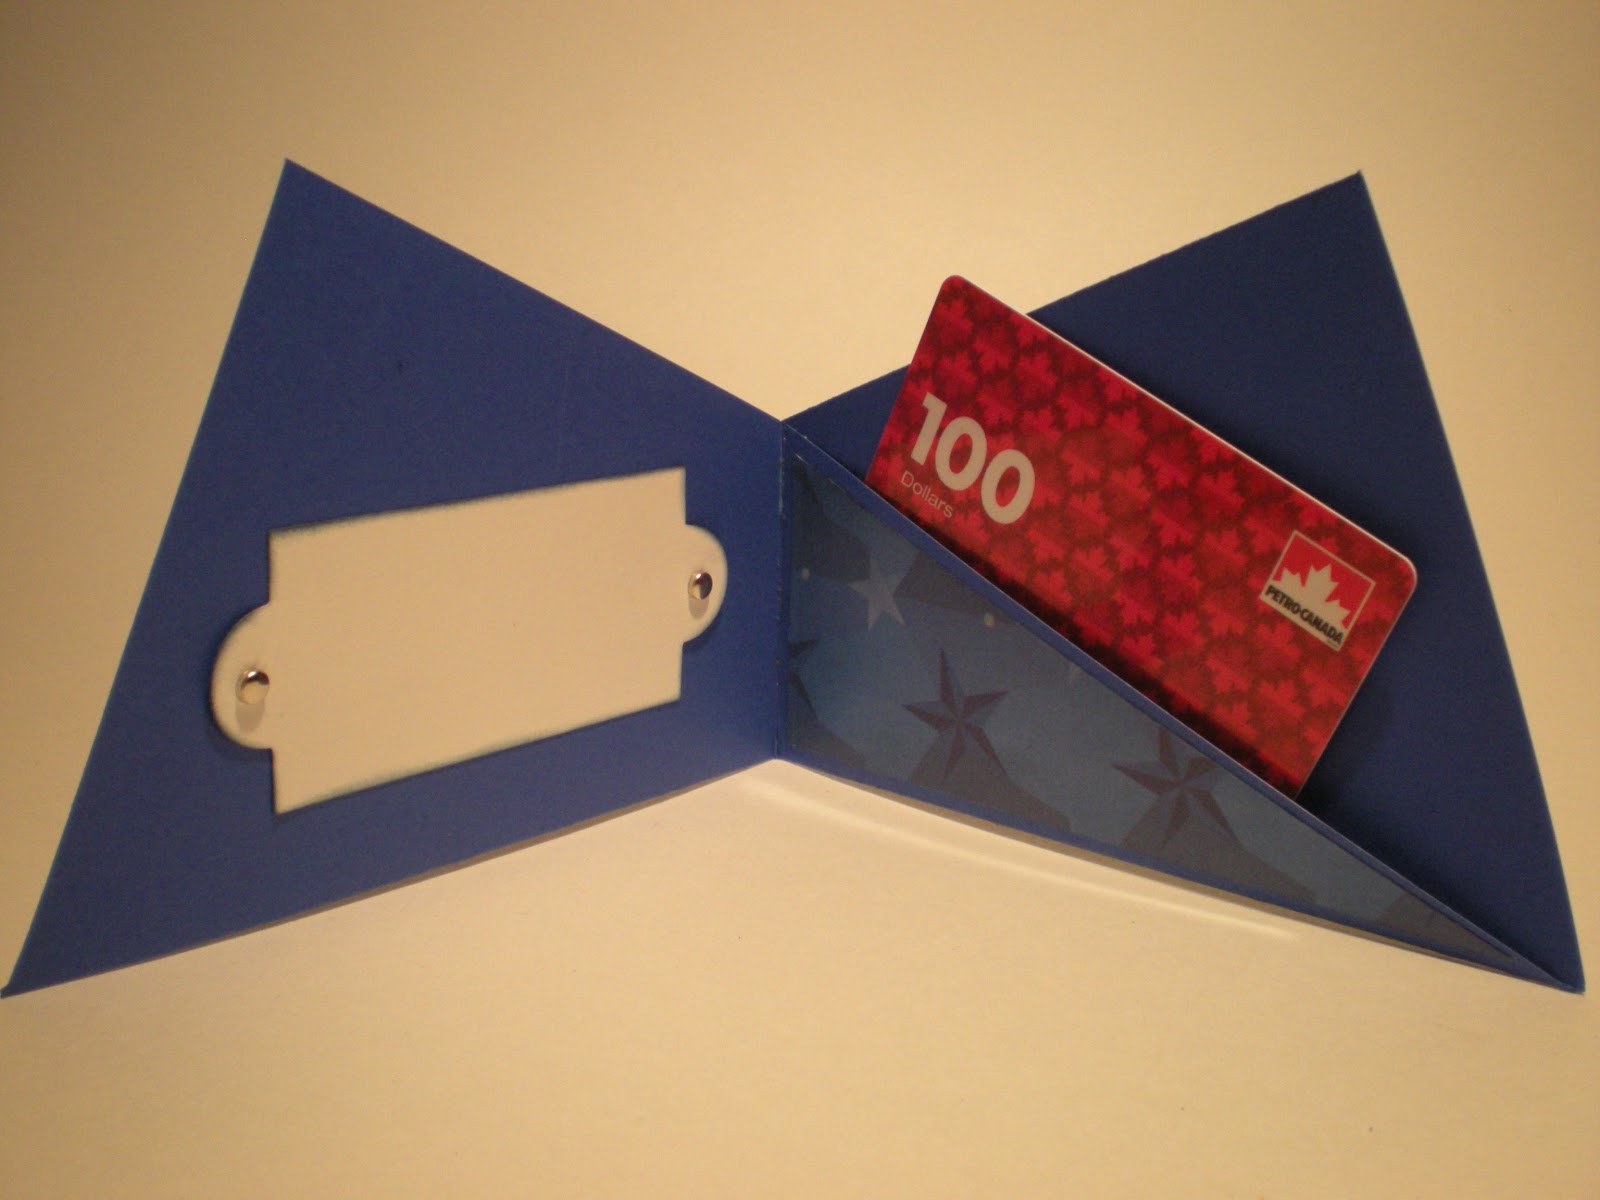
The first one needed to hold four gift cards so I decided to make a wallet.


The next one only needed to hold 1 card so I decided to make one of the new gift cards that are all the rage on other sites.  I must admit though once it was made I really was not all that impressed with it but it works.


Thanks for stopping by.

Nancy

Your comments mean a lot to me so please remember to leave one.  


Sunday, December 23, 2012

Edwin's First Christmas

It's going to be a very special Christmas this year with our new Grandson Edwin.  As my own children grew up each year we would make an ornament together along with a special ornament that held their picture for that year.  Then when they were all grown up (can't believe that they are as old as they are) and left the nest they had their own ornaments to decorate their trees with.  Late Night Stampers was also having a challenge this week to create a 3D ornament.

So in keeping with the tradition I asked his Mom and Dad if they would like to make an ornament with Edwin's help.  Only being 11 months old it is pretty hard to ask him to make it on his own.


It was a little tricky getting him to cooperate but bottle in hand we managed to make a production line of the ornaments.

We started with a glass ornament and Versamark. Inked up his hand and foot and heat embossed his prints onto the ball.  Added the date and Edwin you now have your very first ornament!


Congratulation Edwin...You have now started your very own ornament collection!!

Grandma Seed


Saturday, September 29, 2012

Cardabiltiies #60 - Wings of a Butterfly

It's Cardabilities day and today they have a great sketch for you to try out.  This sketch again leaves a lot to the imagination and I know that you will be able to come up with something great.

I have decided to go with a butterfly theme for this card and have used the Beautiful Butterfly die to create 3D butterflies.  
By die cutting 3 of each of the butterflies the two extra that are cut out are folded in half and then glued to the front butterfly.  By doing this it gives the illusion that the butterfly is actually taking flight.
You can see on this close up that the butterfly actually has a front and back to it.  I have used wire and seed pearls to give the body a blinged up look.

I hope that you will hop on over to Cardabilities and give the sketch a try.  Don't forget to link up your photo so that we can all see your great work.  I'm sure you will enjoy what the other Designers have in store for you as well.

Thanks for dropping by.

Nancy

Your comments mean a lot so please remember to leave one.


Wednesday, April 18, 2012

Butterfly Kisses and Birthday Wishes


I needed a simple but elegant birthday card  and decided to give the Mojo Monday sketch challenge a try. 

I started off with a Whisper White 4 1/4" x 11" and folded to form a landscape card. Then cut a piece of Whistera Wonder 4 1/8" x 5 1/4" and embossed it.  A third layer was added measuring 2 1/4" x 5 3/8".  This layer hangs over the embossed layer by just a touch.  Then again another piece of Whisper White was cut 2 1/8" x 5 1/4".  I purposely punched the holes so that they appeared to fall off the white and then ran this piece though the embosser.  

Now with the base of the card done I used my SU Beautiful Wings embosslit and punched out three(3) sets of butterflies.  Folding two of the butterflies in half I then attached them to the third butterfly.  The third butterfly became the top layer.  By doing this it makes the butterfly look like it is floating on the page.  Each of them was adhered to the punched opening and accented with a pearl.  

Odd numbers are the way for decorating so I used the remaining three tiny butterflies to turn the four larger ones into a total of seven on the card front.  Added a simple "birthday wishes" and ready for the birthday girl! 
I hope you enjoy my interpretation of this sketch challenge.  

Nancy

I like to hear what you think, so please leave a comment.


Tuesday, March 6, 2012

TST #56

This week was really a challenge over at Try Stampin on Tuesday .  Yes this one was difficult for me to come up with a card.  I actually was considering not doing it this week.  You ask why?  Because I am not used to making cards that are in this shape.  I see lots of other cards done this way and really like them, but just haven't tried this style.  So with that being said I hope that you enjoy what I have come up with. 

Using a Spellbinder I cut out the largest of the shapes and the small portion that I cut off from the top I adhered under the bottom of the larger portion .  The scalloped edge punch I punched one side then flipped it and punched the opposite side.  "Thanks A Million" was stamped using the Stamp-a-ma-jig to make it fit inside the lace.

The flower is a combination of six layers from the Fun Flowers die.  Three of the second largest and three of the smallest size.  They were adhered together with a brad in the flat state and then I spritzed each layer with water and scrunched each layer, one layer at a time.  Once the flower dried it was as hard as a rock and I will certainly use this method again as it makes the flower really keep its shape.

Even though this card was difficult for me to produce I pushed through it and was happy with my end result. Now get on over and try it for yourself.

Hope you enjoy!

Nancy

Wednesday, February 29, 2012

Picture Inspired

I had seen a picture in a store and loved the way it was mounted in layers in the frame.  I couldn't wait to get home to give it a try and this is what I came up with.

First I needed a center point, Fleur de Lis to the rescue.  Then using the Spellbinder Nestabilities Label Five I cut out three layers.  The layers that I cut out I saved and used on the inside of the card.

Then I had problems with the bottom of the card.  I loved the top and got stuck on the bottom.  Then I thought if I had the right lace it might work.  So I used a strip of the paper that I had used for the top cut outs and after it was punched I ran it through the crimper twice to break up the fibers and make it more pliable.  Sticky strip was used to adhere the paper lace to the bottom and topped it off with a satin ribbon.

Hope you enjoy!

Nancy

Tuesday, February 28, 2012

TST # 55

Are you ready?  Come on join in on this weeks challenge over at Try Stampin on Tuesday.

This one was really fun to do.  Started off with an embossed background and then stepped up using dimensionals two Spellbinder frames.

Using Fabulous Florets I stamped out the image of the two flowers three times and then cut out each pedal and sculpted it to form the flower.  For the stamens I used a piece of the plain CS and cut a three small circles for the large flower and two small circles for the small flower.  Then fringed the circle and ran it over the Night as Navy ink pad.  Scrunched it up and glued it in place.  This gave the flower a true 3D effect. Stamped three single leaves and filled them in with Old Olive and a blender pen.

Topped it off with a grosgrain ribbon.

Now it's your turn, come on let's see what you can do!

Hope you enjoy!

Nancy